Saturday, January 26, 2013

Wedding Shadow Box

Yet another Pinterest find... a wedding shadow box!

I love any project that incorporates stationary and memorabilia so this was a perfect idea.  I knew I already saved many things from the wedding that I wanted to make into something but I didn't know what...

A routine trip to HomeGoods lead me to the awesome find of the shadow box from $20.  It was a black, distressed finish complete with a tan material on the inside with pearl push pins.
The wedding invitation was a must along with a few pictures to commemorate the day.  Left-over plum scrapbook paper framed the invite to incorporate the main color of the wedding and to bring it all together.  I snipped off a few buds and blooms from my bouquet along with T's boutonniere to pin as embellishments.   Remembering a few more details that I had made for our special day, I had to add the bell and ribbon wand, and drink stirrer.  I placed the ribbons around the other pieces.  One last addition was our thank you card picture of us holding our thank you boards I made.

It took a little bit of time trying to figure out the best configuration of keepsakes and photographs.  After some time, I finally found the best mix and careful pinned it all down.

T put it up for me in our room and I know remember our special day every day!


Tuesday, January 15, 2013

Dad's Collage

This past year was a great year filled with a wonderful honeymoon (I'll have to share pictures later), a new home (again, pictures coming soon!), and fabulous celebrations.  My dad turned the big 5-0 this year and of course we celebrated in a big way!  I helped my mom plan a fun, low key surprise party.  We knew we wanted to put quite a few pictures on display but I vowed that I would never make a mundane poster board with cutouts and "funny" sayings.  I went to my trusty Pinterest account and started the search for a memorable DIY picture collage project.  Then I found it... a photo collage in the shape of the number 50!!!  PERFECT!  The site did not give any information on how to make it, but my brain was going crazy with ideas of materials and procedures.  I knew exactly what to do without any instruction.  I visited my local craft store to buy huge foam board (2 pieces).  I sketched out a 5 and a 0.  Using a utility knife, I cut out the numbers with care to not hurt myself or my hardwood floor!  My mom had been collecting old photos of my dad with friends and family so I began to place them on the numbers.  I had so many photos left that I decided to use the scarp pieces to build an exclamation point to add more space for more awesome pictures.  I ended up printing more photos (from the wedding and recent adventures) and scattering them throughout the collage.  After I was happy with the placements, I used the amazing Glue Dots to stick them to the foam board.


The night of my dad's surprise party, T helped me hang the collages above the awesome mountain bike cake for everyone to check out.  It was a hit and everyone liked taking a step back in time... but most importantly, my dad loved it! <3

Infinity Scarves

So, I first saw these crocheted chunky infinity scarves on Pinterest and thought to myself, "I can do that!"  I immediately thought back to when my mom taught me how to crochet.  I remember the first scarf I made for my mom while I was in Organic Chemistry lecture... it was light pink, short, and completely uneven.  When I held it up it, had a beautiful hourglass shape... not necessarily what you want to see in a scarf!  Needless to say I have yet to see the scarf dawned by my mother, but no hard feelings!
I mentioned my thoughts about making this infinity scarf to my mom and she bought a skein of chunky brown yarn called "Barley."  I started the scarf with an N hook.  My mom helped start it for me but after showing me how to double crochet, I was on a roll and did not want to stop!  
Here is the finished product!
 
After making the Barley scarf, I couldn't help but want one in EVERY COLOR!  I ran out and bought "Dallas Gray."  I altered the pattern a bit to make it skinnier and shorter.  Here is what it came to be...
I also made one more in a beautiful chunky off white yarn called "Fleece."  I wear this cream-colored scarf the most since it goes with most outfits/colors.

I was excited to be invited to Katie's 7th birthday and knew exactly what to give her for a gift... a scarf!!  I knew Katie LOVED blue so I chose a gorgeous "Ocean Tide" yarn and crocheted a smaller version of my gray infinity scarf.  I added a cute crocheted lavender rose for a finishing touch (the rose is also a completed and successful Pinterest Project!).  She loved (and rocked) it!


Sunday, January 13, 2013

Long time, no post!

It has been quite some time since I have posted!  I have been thinking and decided that since the wedding has been over, it is now time to transform this blog into a space of inspiration and reflection.  
TJ jump started my passion for photography when he gave me my camera for a wedding present so there will definitely be photos here.  Along with photography, I have fell in love with Pinterest and completing projects that I find.  Needless to say, you will find a menagerie of completed and in-progress Pinterest projects.  I'm excited to turn over a new leaf and begin blogging again!

Tuesday, May 29, 2012

Wedding Day Recap 1

Hello all! 
It has been over 6 months since TJ & I were married and quite some time since my last post so I have A LOT to share! I've been thinking of the best post to return with and I believe a recap would be ideal.  So here it goes!
First of all... I think Kaylee was excited for our wedding and to debut her beautiful Flower Girl dress!  <3 her so much!

The day began with morning preparations... hair and makeup.  I had stayed at my parents home the night before while TJ stayed at the apartment.  I ventured to the salon bright and early.  My hair was done by my usual hair stylist, Sherri, at Salon Bellissima.  
My loving friends, Holly, sent her husband over with Starbucks for Sherri and me, too!  So thoughtful and needed!

Once my hair was finished, we raced to my parents' house to pick up my dress and the rest of my caravan!  Here we are en route!  Wearing my DIY puffy painted Mrs. Hunter jacket :)
When we arrived, the race was not over... I ran up to my makeup appointment with the girls at the Heldrich.  I absolutely loved the relaxing setting and it definitely allowed me to take time to breathe (I had been forgetting to do that, apparently).  
I could not believe how amazing my makeup looked!  I was so impressed with the professionalism of the ladies at the Heldrich and I was so thankful that my sister in law Joan stayed with me the entire time!  When I arrived at the suite, the nerves set in!  The photographers were there already and prepared to begin taking pictures.  My wonderful cousin, sister in laws, niece, mom and dad were all there helping to set everything up.  Mary was snapping beautiful pictures that rival the professional shots taken!
While I was getting ready, Mary took a few shots of the little details along with the photogs.  Such a great eye!  This is one of my all time favorite pictures taken by Leah and Jeremy of Art Work Photography...
While the ladies were getting ready at the Heldrich, the guys were getting ready at Jeff & Carmela's house. 

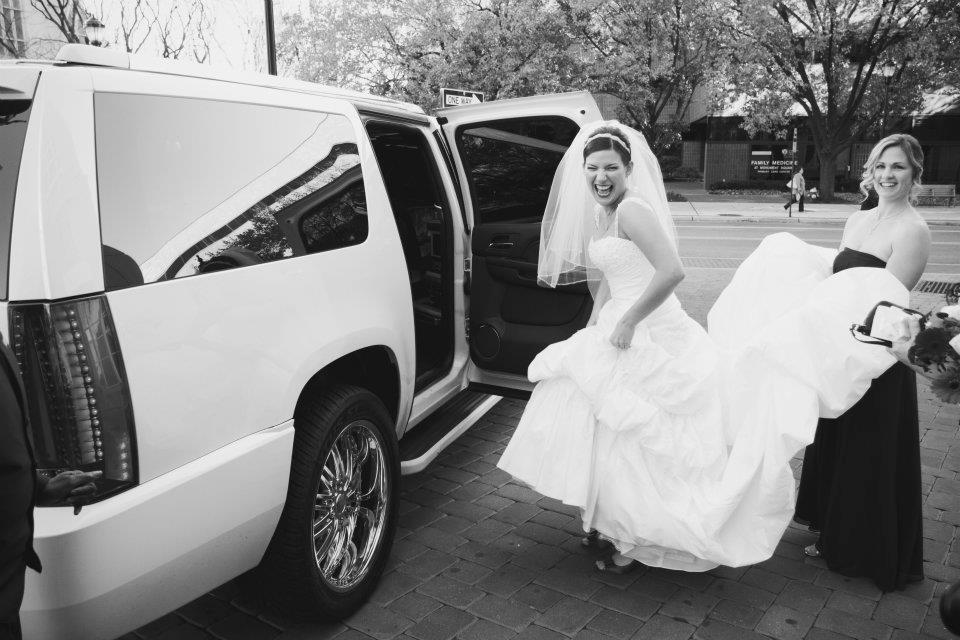
All of the sudden, I was told my limo was ready to take me to meet TJ for our first look at Old Queens of Rutgers. 
When I arrived, I had so many butterflies in my stomach I couldn't stand it!  I could not wait to see my groom!!  My limo driver, Marla, was great... she helped me with everything; my dress, my veil, my flowers, my nerves...  I walked up to meet TJ.  I could not hold in my emotions any longer.  
He looked so handsome and he was all mine! :)  When he turned around to see me, I will never forget the look on his face!  He had this sweet, surprised look and simply said, "wow." 
We were able to take some of the most amazing photos in Old Queens.  We loved the old architecture mixed with our formal attire.  The middle photo above shows where we were to marry... a beautiful Gothic church covered from sidewalk to bell tower in scaffolding... That is our angry shot.

From our first look, we picked up our fantastic bridal party and shipped off to Rutgers Woods to take even more photos.  After a bottle of Patron Cafe and other lovely alcoholic beverages, we had arrived and were ready to strut our stuff! 

To be continued...


Monday, January 23, 2012

Our Happily Ever After...

Salutations! It's been a while...

So, the wedding has been over for just over 2 months now and life could not be better! We just received our professional photos from our photographer and it is stirring up many memories from our amazing wedding day! From the flowers to the DJ, from the First Look to the last dance, the wedding went magnificently off without any major hiccups. Of course there were some minor set backs (no sparklers, DJ forgetting a special dance, messed up cakes, unused cocktail stirrers...), but it would not be a true, fun wedding without them! Also, you need something to laugh at when you look back!

I will recap a few details and then the day in this post. I may get winded and have to split this into more than one post.

The entire day was a whirlwind to say the least! Everyone told us that the day would go by fast so we took many married couples' advice and took it all in. We made sure to stop throughout the day and look around us and talk to each other about everything. I remember doing this and because we did, I remember even more than I would have had we just gone about our day. One thing I remember vividly is when we first entered the ballroom during the cocktail hour. It was just T and me and we walked around looking at the centerpieces, the favors, cakes, lighting, our sweetheart table, etc. I also remember our First Look VERY well, but I will explain that later.

After many discussions about videographers and whether or not to hire one, we agreed on hiring someone to tape just the ceremony. I could not be happier we chose to do this! Just before I get out of the limo with my parents, I began to have a panic attack. From then on, I do not remember many details about the ceremony. Guests told me a hopped after being pronounced husband and wife... nope, don't remember! But now, thanks to Shaun & Tim and the miracle of DVDs, I can see myself in all of my cheesy, humiliating glory!

To be continued...

Monday, November 14, 2011

stationary...

So it is the final countdown (cue the song by Europe)! Only 4 days left and I will be a Mrs.!
I have been looking through everything I have made up to this point and even T said I should put together a portfolio... my second career idea other than Sweet Disposition!
The most recent of my DIY stationary endeavors would have to be the programs that will be distributed to our guests who attend our ceremony (FYI: to those of you who don't know, the beautiful church we chose to become married in is now covered from sidewalk to bell tower in construction scaffolding). We decided to go with a simple single folded program in white cover stock (see the post about staples). This way, I could design the entire thing and print it at home with ease. That is exactly what happened. I made a few drafts and asked T to choose his favorite. He ended up choosing the program on which I placed graphics from our invitations. I framed the outside and inside with hemispheres and scrolls from our invites. I then used one of my favorite free font websites to add a little font flair. I even added a little fairytale touch to the back hinting at a happily ever after. The last thing I added was a little sparkle, of course!